This is the all in one migrating Tutorial / How To if you plan moving to ownCloud.
You are right here, if you are currently using Google Contacts and Google Calendar, or their Apple/Yahoo pendants and would like to take them under your control using ownCloud.
Table of Content:
- Installation of ownCloud
- All about contacts
- Moving from Google to ownCloud
- Sync ownCloud Contacts with Thunderbird
- Sync ownCloud Contacts with Android
- The ownCloud calendar
- Integrating with Thunderbird / Enigmail
- Sync ownCloud Calendar with Android
- The Desktop Sync Client
Installation of ownCloud
There are three ways installing ownCloud, depending on the system you have:
- Archive Files (for server owners)
- Web Installer (for shared servers, eg. hosting providers like 1&1, Strato, Go Daddy, …)
- Packages (for server owners → those update themselves, so go for them if possible)
Head to http://owncloud.org/install/ and choose your download and follow the instructions.
Check out this tutorial if you’re planning to install Owncloud on a Root Server or vServer.
ownCloud Contacts
Sure, ownCloud is a cloud storage solution, but you wouldn’t be here if you do not plan to use more of their awesome features – like the Contacts app.
So the main question is: how to change from eg. Google Contacts to your ownCloud Contacts without damaging anything in your whole ecosystem containing Webmail, phone, tablet, Laptop, …
Moving from Google to ownCloud
Exporting the Google contacts is quite easy but can get you some head ache when done wrongly: Head to the website https://www.google.com/contacts/ and click More > Export.
The important point is, to chose vCard format as your export format. Define the groups you would like to export and click the blue button.
(btw – this is a great opportunity to clean up your existing contacts and remove some of the old, never used and dead contact 😉 )
Now we import your existing contacts into ownCloud:
Go to the contacts page of your installation and click on the gear icon at the bottom left. Below Import choose the option Gmail vCard, click the upload button and navigate to your just exported vCard-file.
Sync ownCloud Contacts with Thunderbird
So now we have our contacts online…well that doesn’t use much, so let’s get them running on our others devices.
Download and install the Thunderbird PlugIn SOGO Connector (not Integrator!) from here: http://www.sogo.nu/english/downloads/frontends.html
(Right click on the download link and select Save Link As…, and install it in Thunderbird by clicking the little option item next to the search bar in the addon-tab)
Now we need the cardDAV URL from your ownCloud installation. Therefore click at the gear icon (bottom left) in the contacts Tab, and then on the link icon next to your current contact List (3rd Icon). Copy this link to your clipboard.
Open Thunderbird and go to your Adress Book by pressing Strg+Shift+B and select File > New > Remote Adress Book which opens a dialog. Paste in your cardDAV URL, give the contact list a name and check periodic sync if you want this (btw, for me the initial sync only worked with this option checked!).
Sync ownCloud Contacts with Android
In Android native cardDAV accounts are not supported, so we need an app for that. Go pick up cardDAV Sync from Marten Gajda: https://play.google.com/store/apps/details?id=org.dmfs.carddav.sync
The Setup is easy and similar to the one in Thunderbird, just insert the cardDAV Url of your ownCloud contact list you wish to sync, add your login credentials and that’s it. Notice: By default two-way-sync is disabled, which means changes on your phones contact are not pushed to your owncloud server (or thunderbird). If you wish that, just enable the option.
Before doing so it may be recommended to delete youre current contact storage:Settings>Apps>Contacts & Contacts Storage and ‚Delete Data‘ in both apps.
Furthermore don’t forget to disable your Google Contacts sync for the case your didn’t already deleted all your Google Contacts 😉
All about Calendar
So let’s move forward to getting your calendar up and synchronizing.
Integrating with Thunderbird / Enigmail
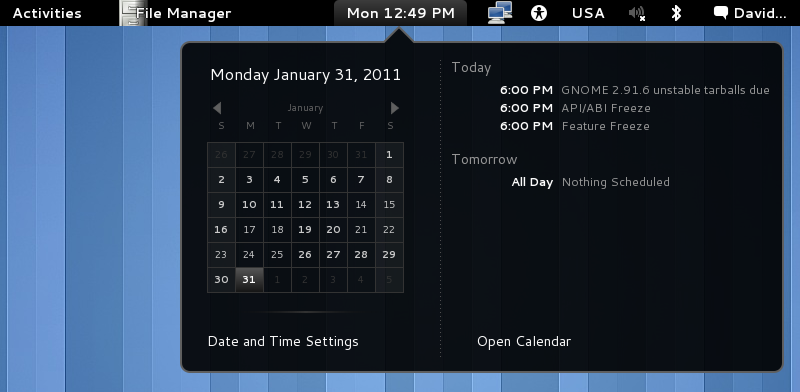
One of the features I like on GNOME 3 is how the calendar of Evolution is integrated. It gives you a fast overview over your next appointments.
To do so, grab your calDAV URL and use it in the dialog you get by Right Click > New Calendar > (type) CalDAV.
I just do this to get the calendar in this cool taskbar widget – so let’s sync your calendar with Thunderbird:
Therefore the plugin Lightning is needed, which you can download here: https://www.mozilla.org/en-US/projects/calendar/
The installation routine is just the same as described above for the Plugin SOGO.
Now switch to the calendar tab, by clicking the new icon at the top right and make a Right Click in the left handed calendar list. Select New Calender > On the network and provide your calDAV URL and the login credentials.
Sync ownCloud Calendar with Android
Again, Android has no support for calDAV by itself, so you gonna need the app (from the same developer as the previous app cardDAV sync): https://play.google.com/store/apps/details?id=org.dmfs.caldav.lib
It costs some Euros, but that’s probably worth it, since I think there is no other simple way to get your calendar synced.
After your installation, just insert your calDAV Url and credentials and everything should be fine.
The Desktop Sync Client
Actually there isn’t much to tell about the Desktop client – it is avaiable for Linux, Mac and Windows.
Remarkable is one thing:
It is able to sync ANY local folder you want to ANY folder on your server.
This is something Drive, Dropbox and Co are missing in my eyes! (I guess MEGA Sync supports this aswell).
For Ubuntu/Debian there is an official package owncloud-client (I don’t know for other distros – just try it). So if you’re running an Ubuntu system you should install this by running sudo apt-get install owncloud-client
All others can find the Download here: http://owncloud.org/install/
